New Reservation from Communico on Vimeo.
NOTE: IF YOU ARE ENTERING AN EVENT INTO THE WEB CALENDAR, IT WILL ALSO SHOW UP HERE, YOU DO NOT NEED TO RESERVE THE ROOM IN BOTH PLACES. The only time staff should be putting library events into Reserve is when you are holding the room for when you are ready to enter it into Attend, for the web calendar. Remember that even drafts in Attend will hold the space, keeping patrons from being able to reserve that space.
Booking a Room
Rooms can be booked or requested on behalf of a patron, yourself or another staff member from within Reserve
Navigate to the Reserve section of the control panel
Click new booking
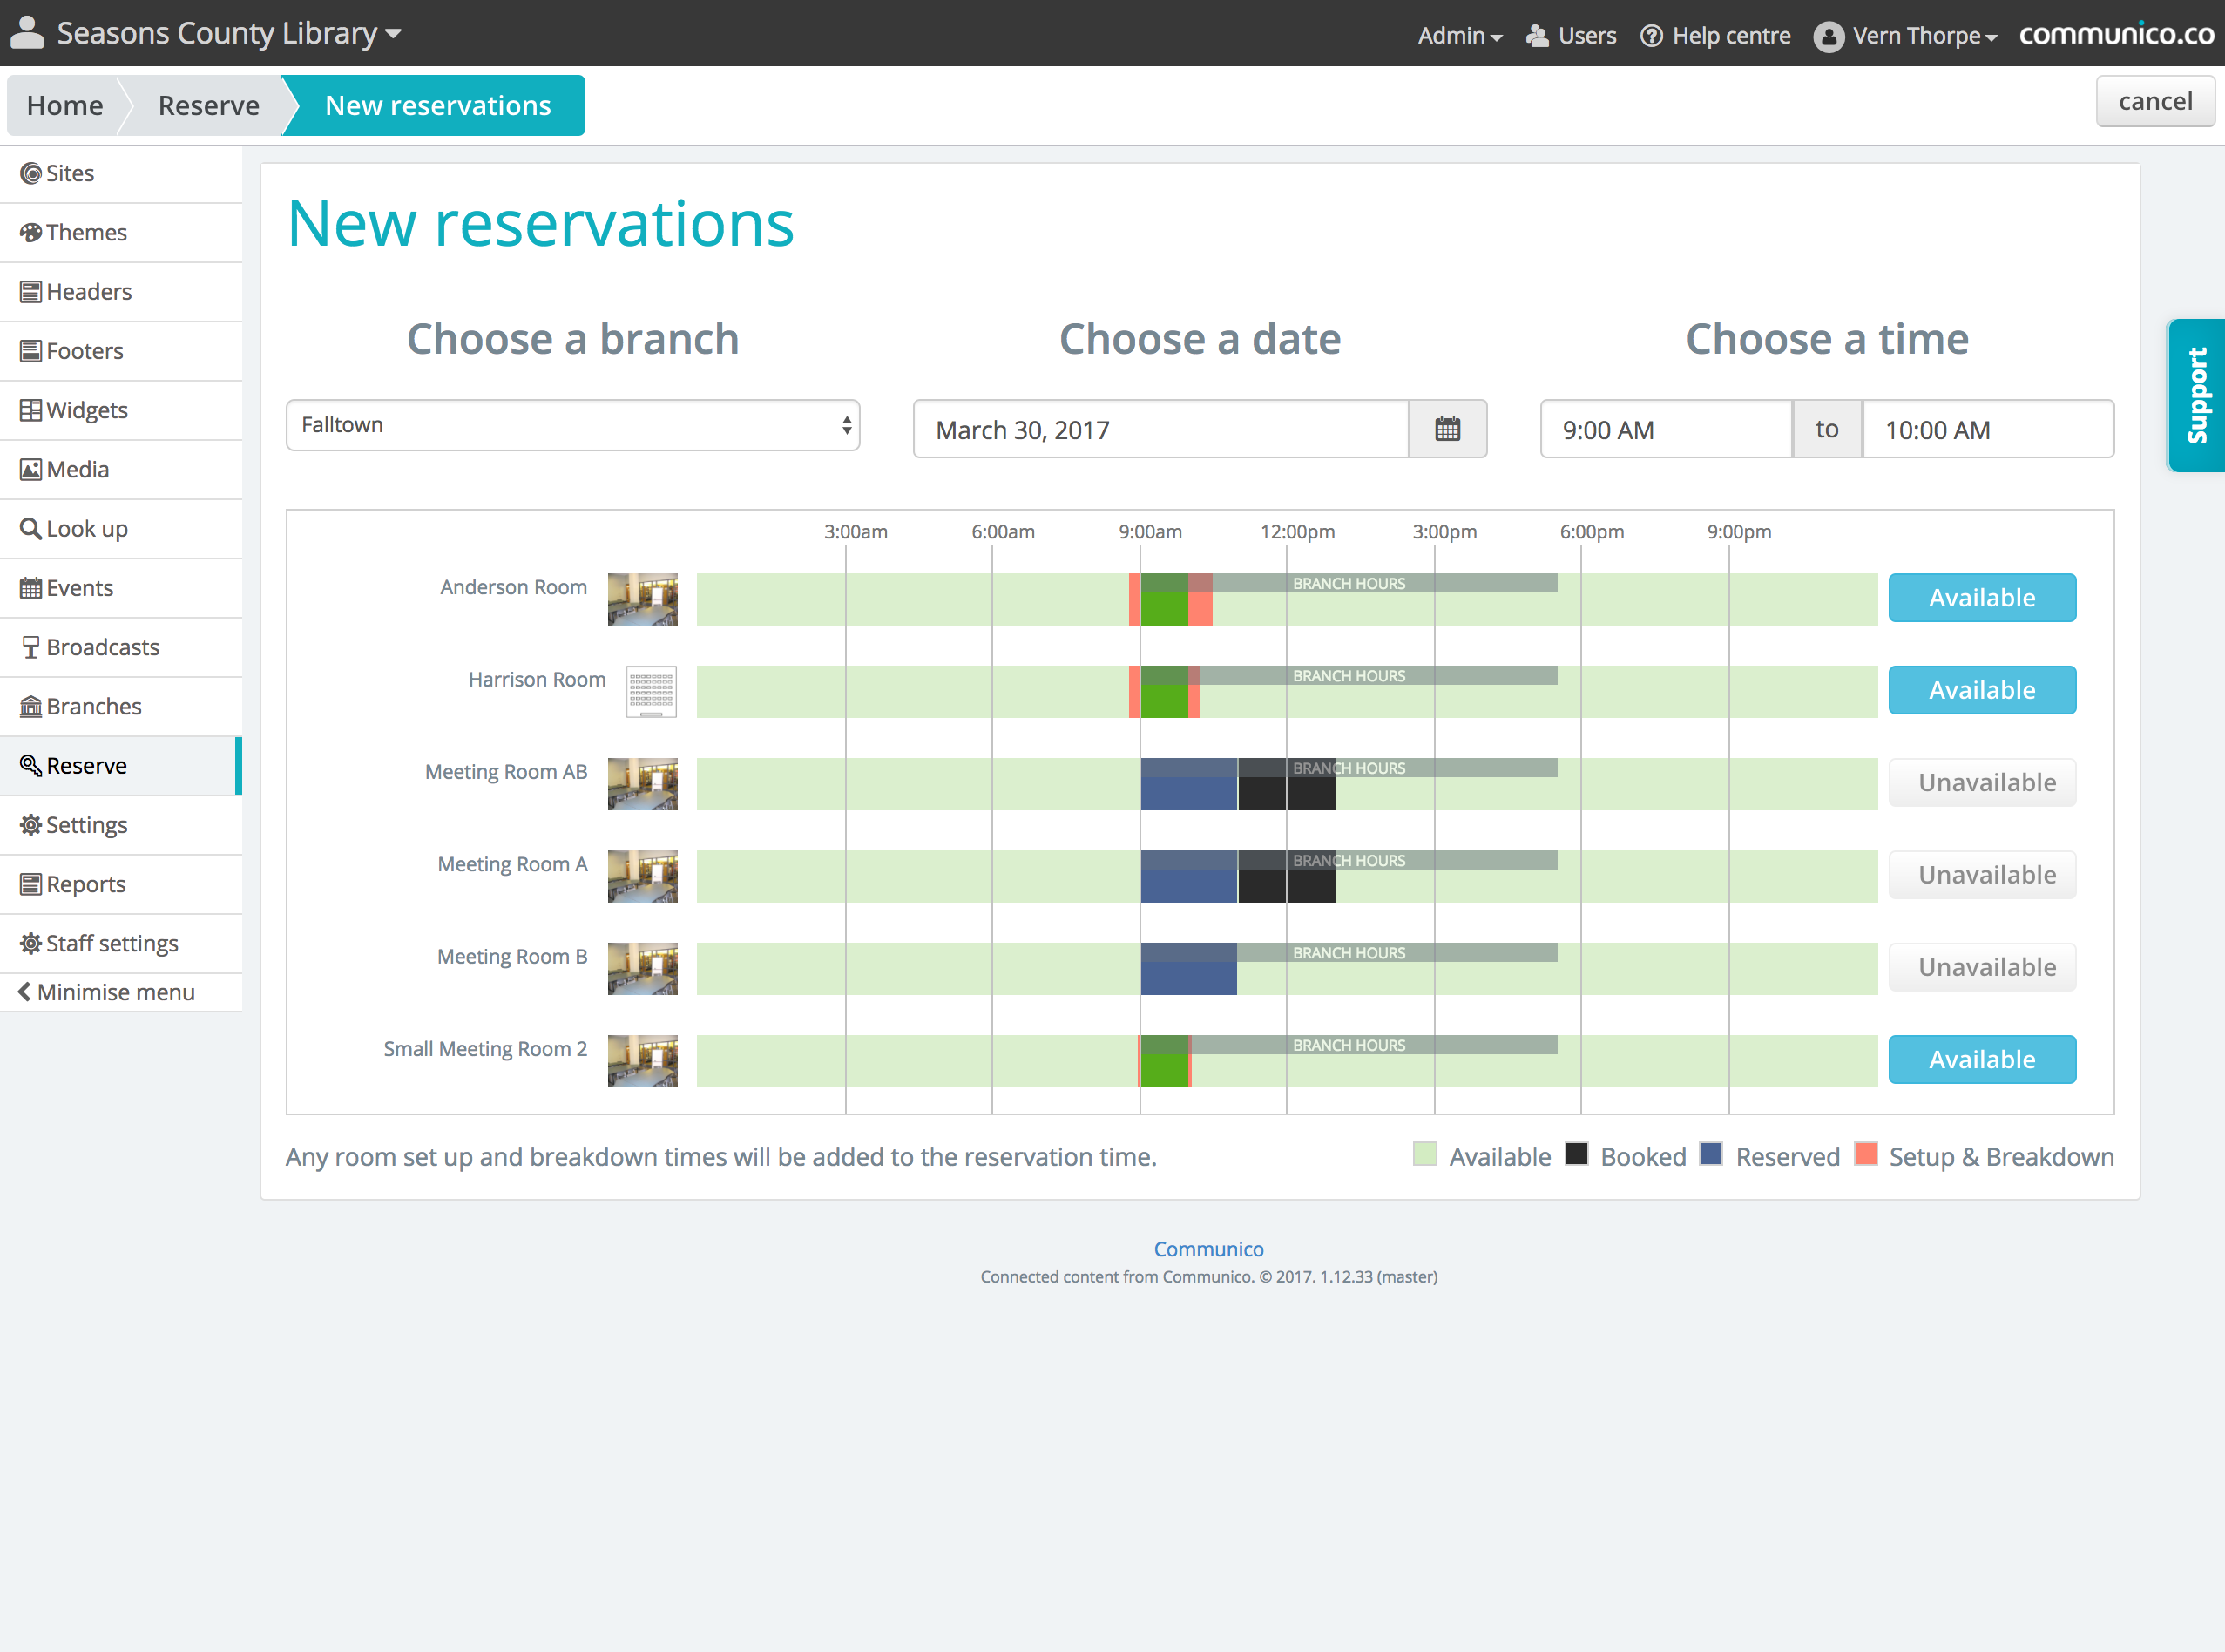
1. Pick a room, date and time
If your library has multiple branch locations, the first step will be to pick which location you’d like to see availability for
Adjust the date, using the calendar tool
Set the time of the booking using the time picker, or by clicking and dragging the green block along the timeline
Click Available next to your chosen room in order to proceed with the booking
Understanding the Room Booking tool
Each line represents a bookable room in that location. You will see the room name and an image of the room - hover over the image to see the room details. The light green timeline shows current availability and existing bookings, and the button will show Available if the room can be booked at the selected time, or Unavailable if not.
Key
Available - the room is available to be booked at this time
Opening hours - the branch opening hours on this day. Use this as a guide when choosing your time
Your booking - you can click and drag this to change your booking time
Set up and/or breakdown time - these will be automatically added onto either side of your booking
Reserved - another booking that has been requested, but not yet approved, or is associated to an event that has not yet been published. Hover over the block to see the details
Booked - the room has been booked and approved for this time period. Hover over the block to see the details
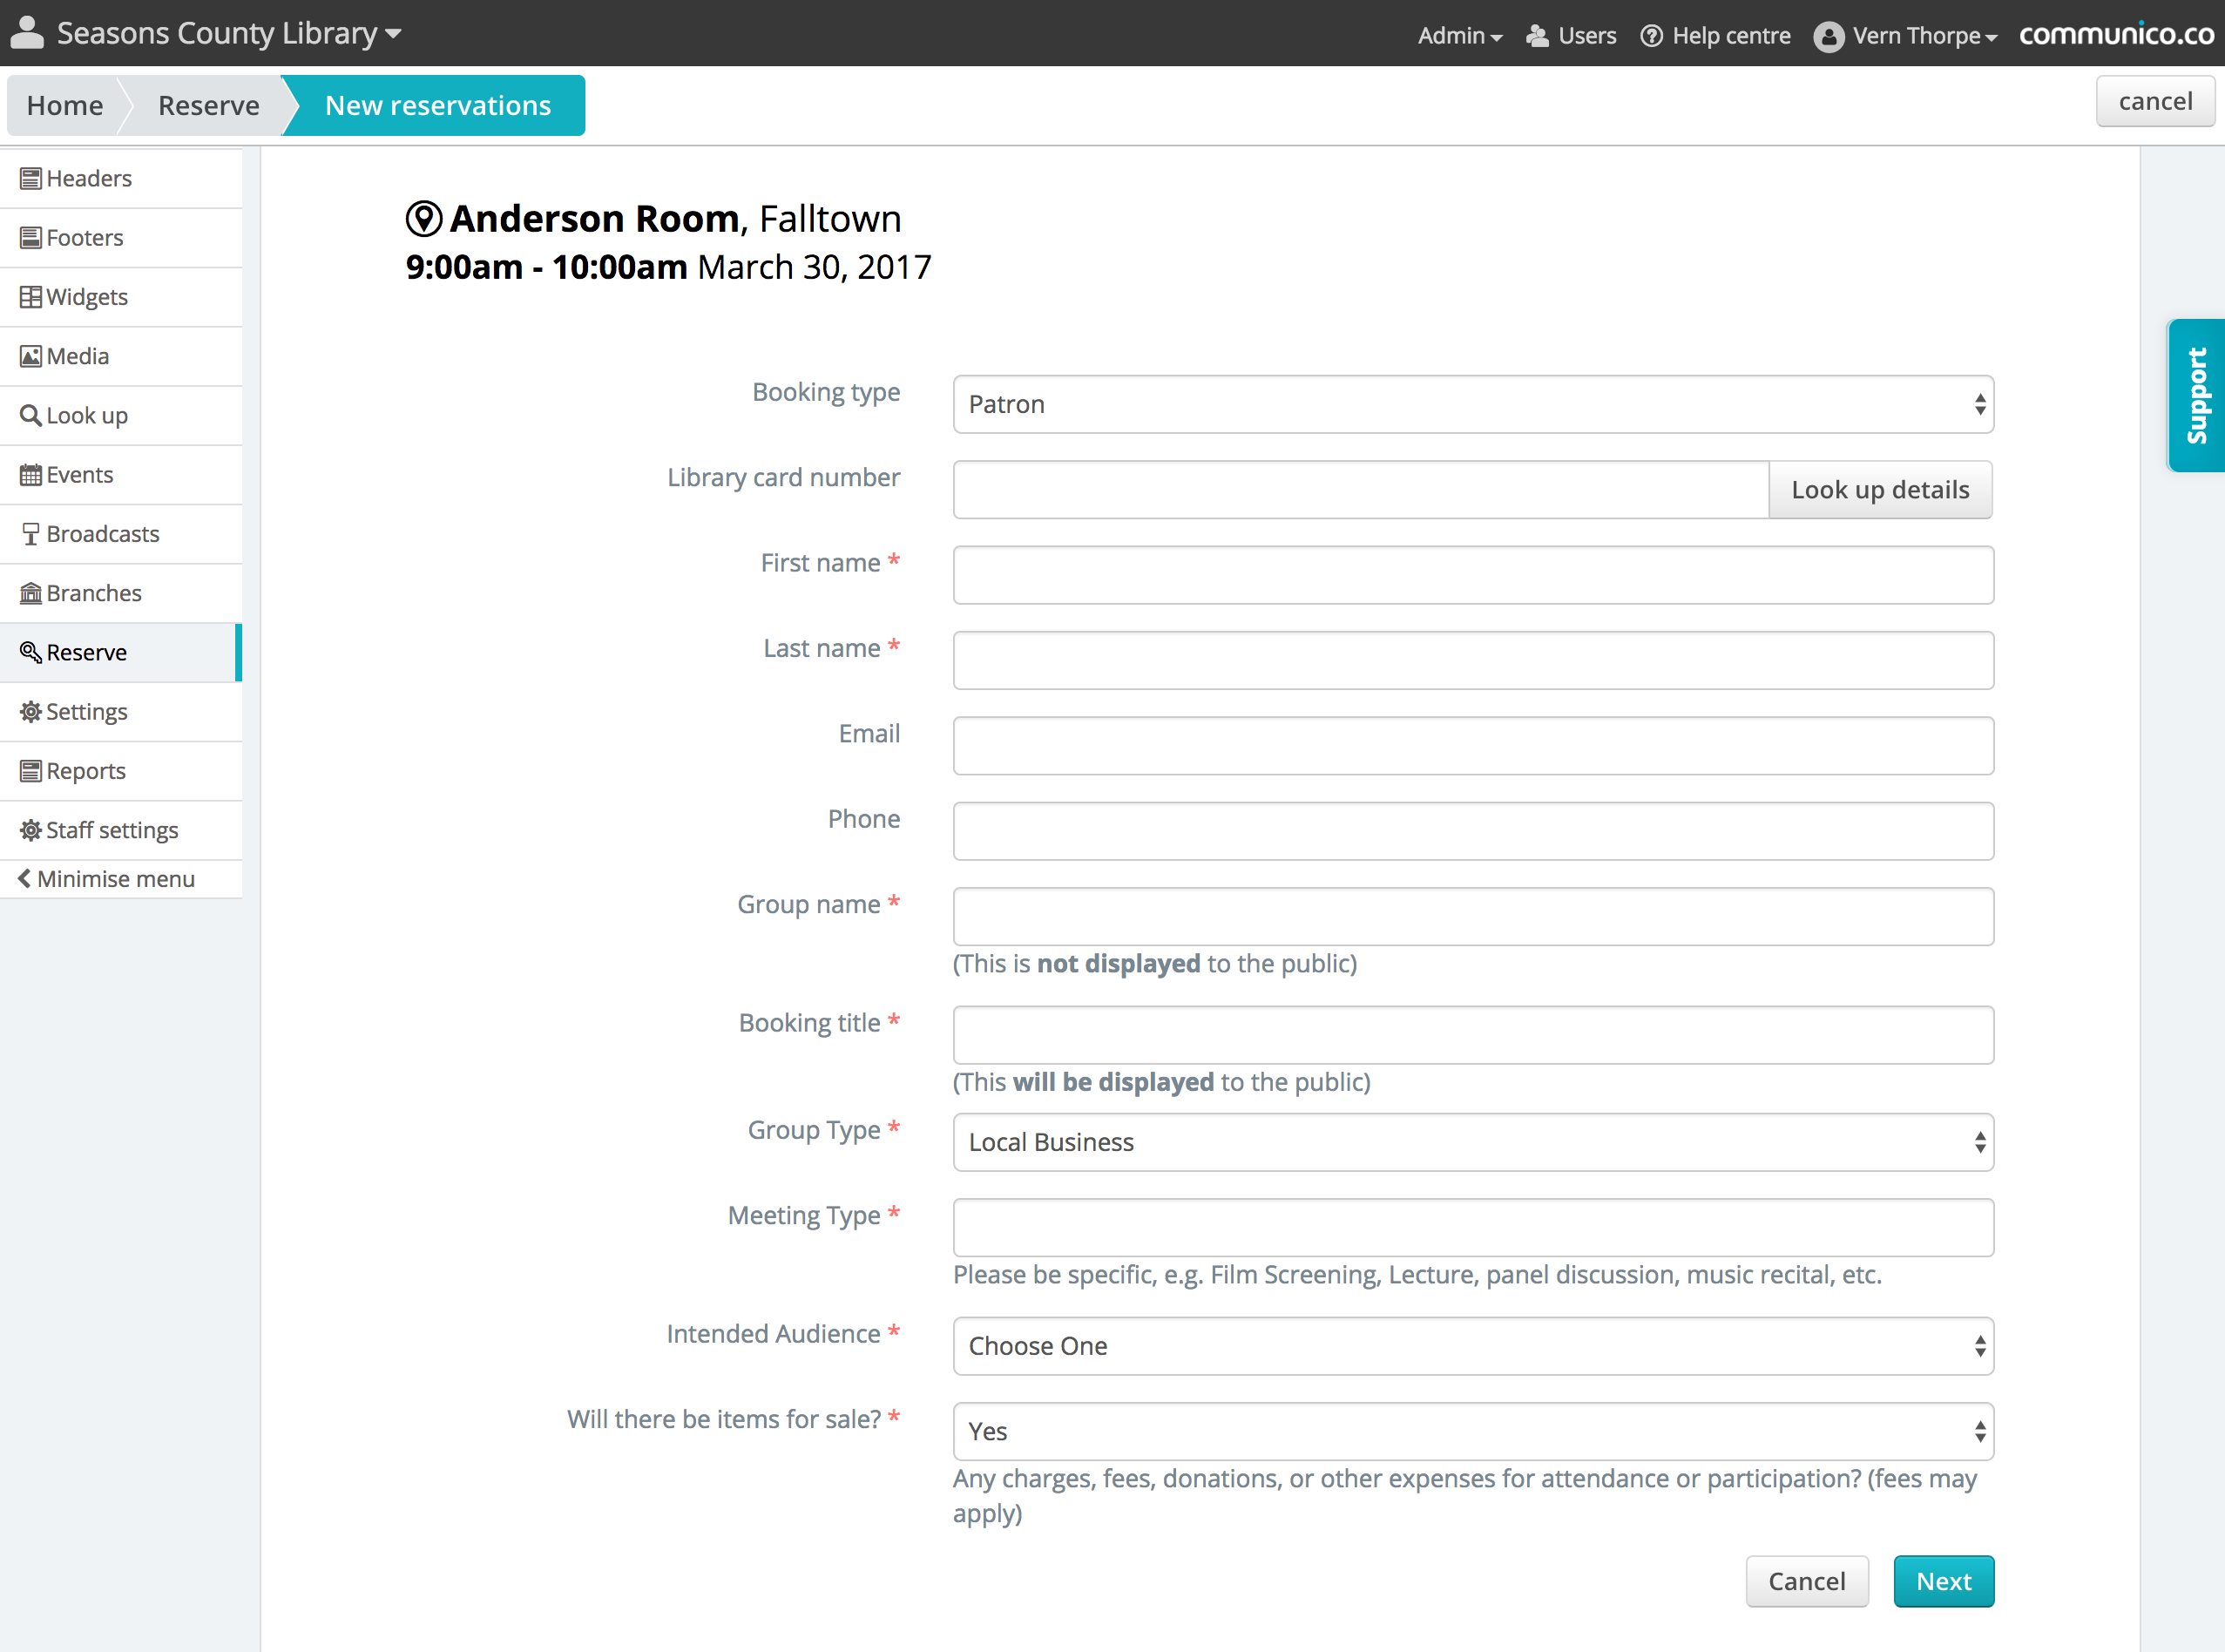
2. New Reservation Form
On the next page, fill in the form with all the details of your booking, starting with selecting whether this is a patron or staff booking.
Booking for Patrons
If available, enter the patron’s library card number. Depending on your settings, this may be a mandatory step, but even if it’s not mandatory, you can use the Look up details function to autocomplete the form with some of the patron’s details.
Enter the patron’s first name and last name, and any required contact details, such as email address and phone number. These contact details will be used for confirmation, notification and reminder messages.
Enter a group name. This refers to the group who will be occupying the room, and will not display anywhere publicly. It can be viewed by staff in the control panel and in reports.
Enter a booking title. This is a name given to this booking, and may be displayed on room scheduler screens (if these are used). It can also be viewed by staff in the control panel and in reports.
Complete any other mandatory fields, and click Next.
Booking for staff
Certain fields of the form will autocomplete with the details of the logged in user, but these can be changed manually if the booking is being made on behalf of another member of staff.
Enter first name and last name, and any required contact details, such as email address and phone number. These contact details will be used for confirmation, notification and reminder messages.
Enter a group name. This refers to the group who will be occupying the room, and will not display anywhere publicly. It can be viewed by staff in the control panel and in reports.
Enter a booking title. This is a name given to this booking, and may be displayed on room scheduler screens (if these are used). It can also be viewed by staff in the control panel and in reports.
Complete any other mandatory fields, and click Next.
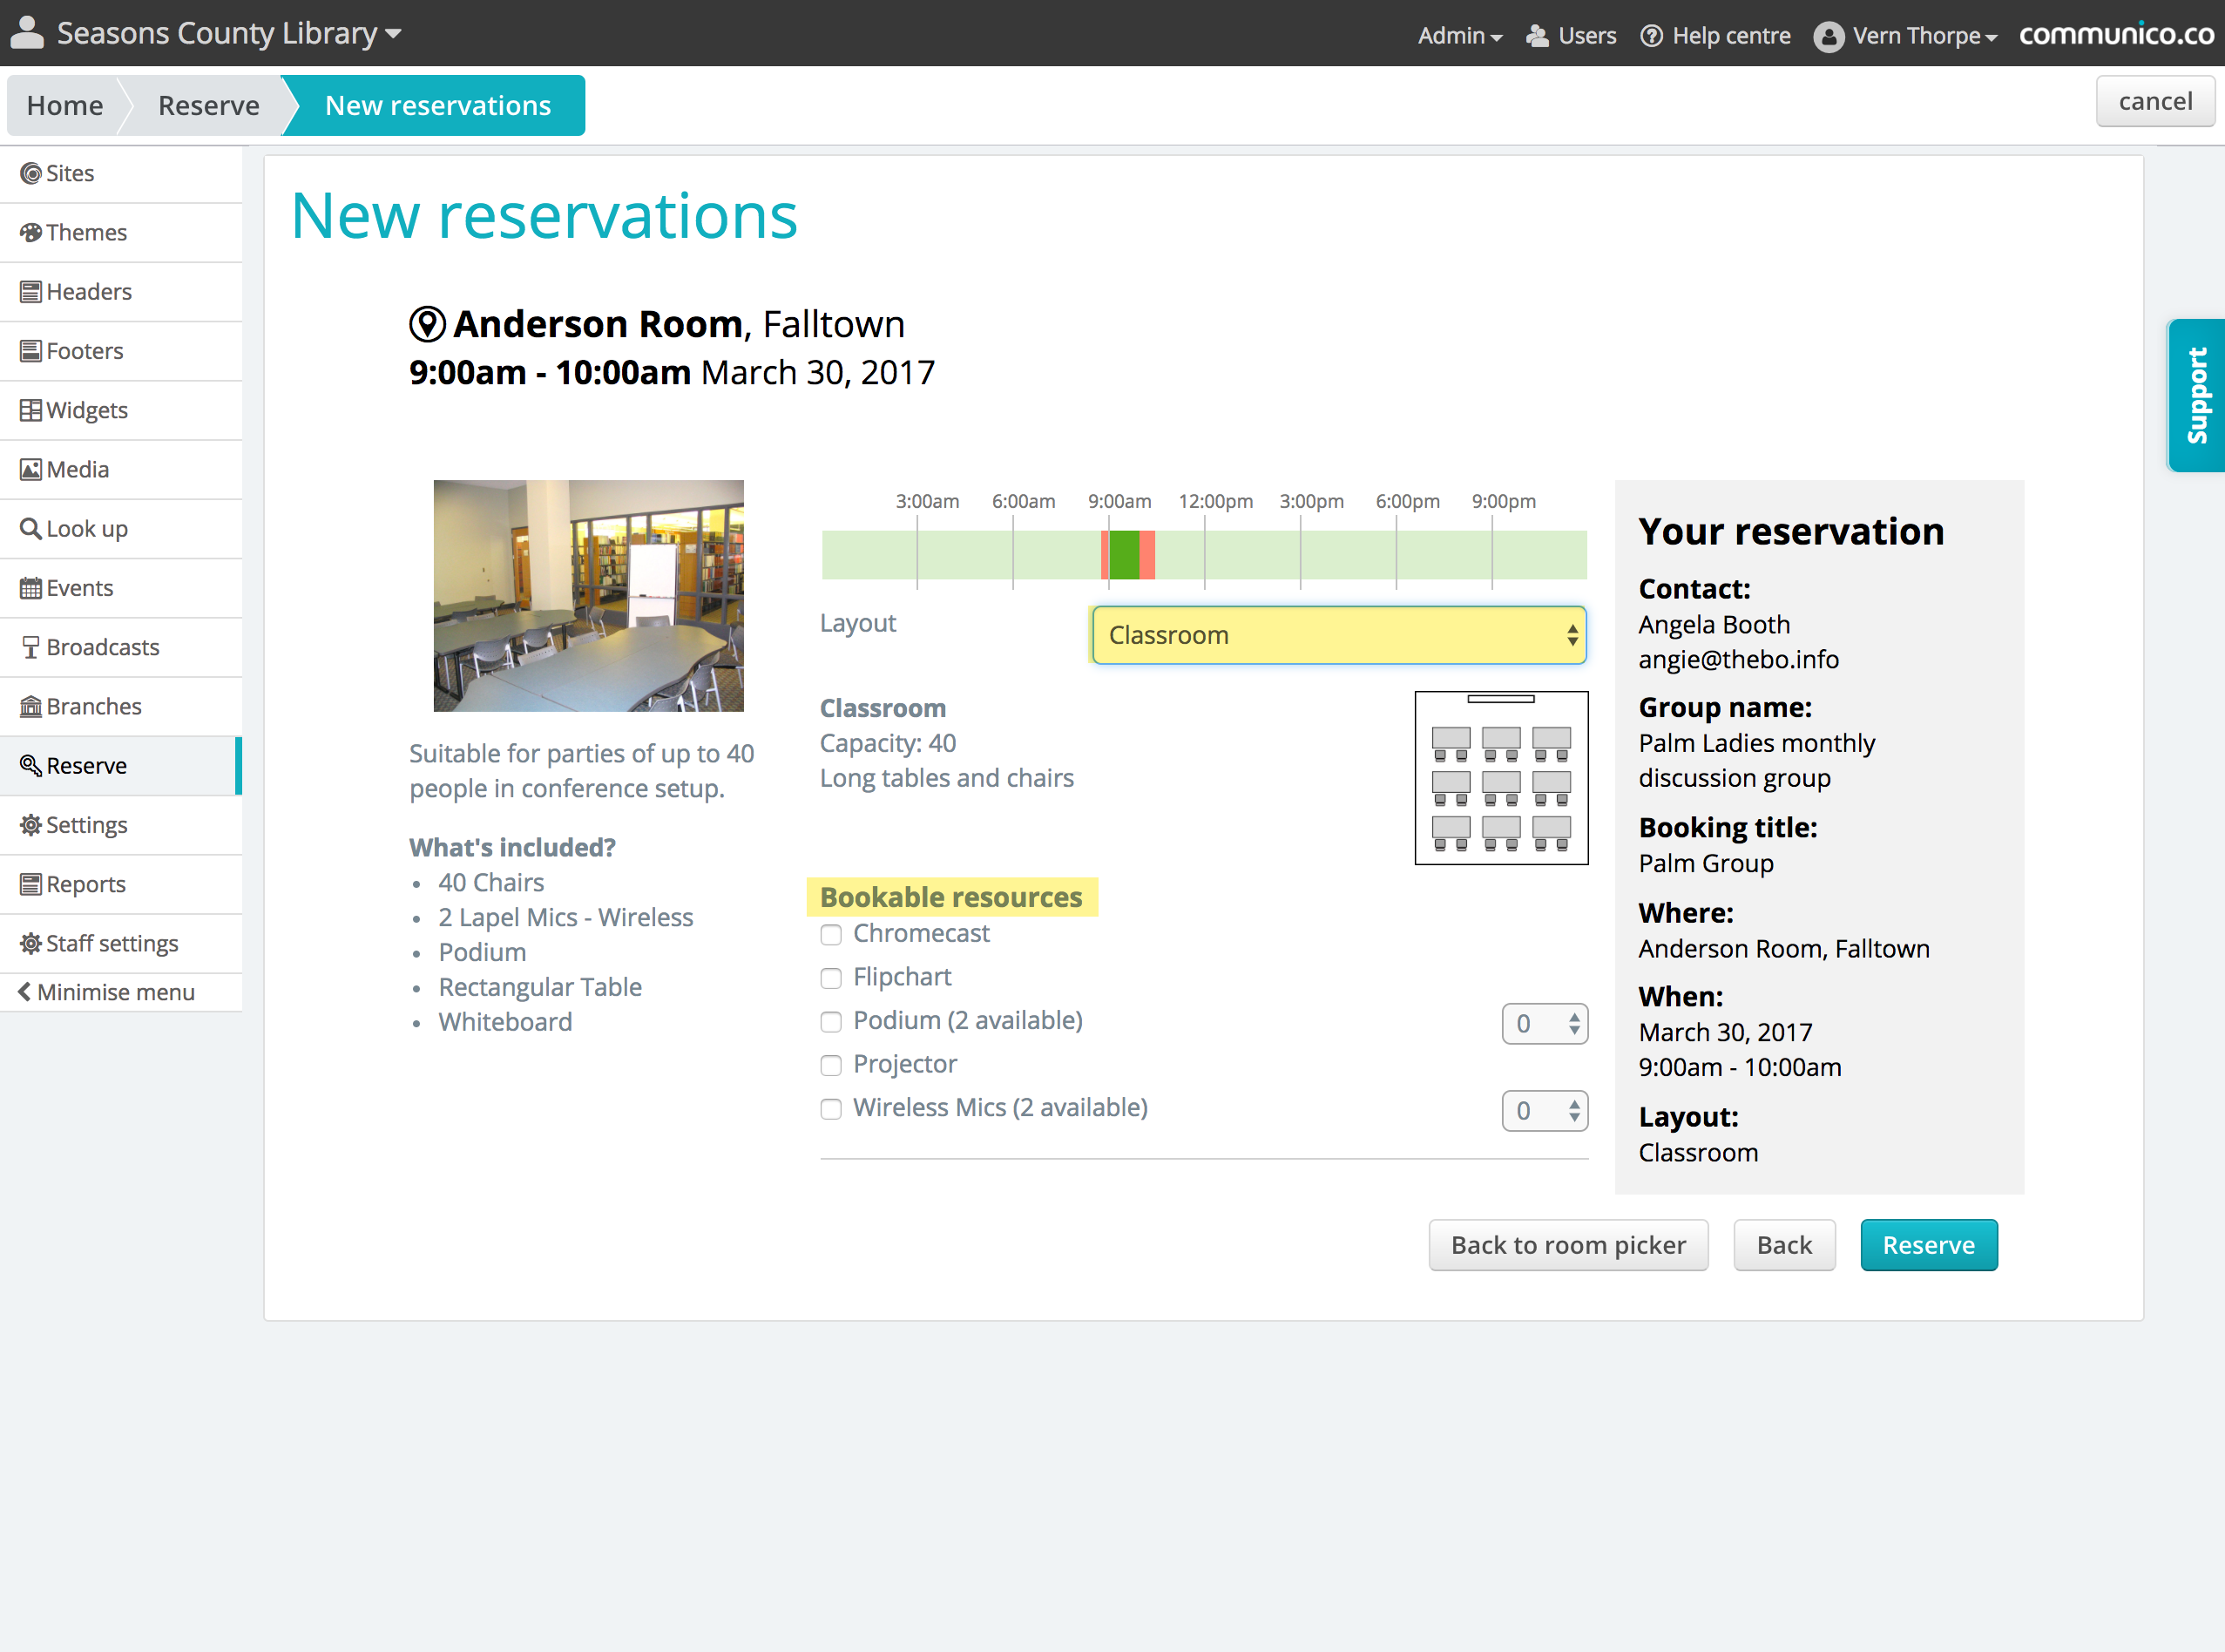
3. Room Configuration
On the next page, you will see details of the room, and your booking. You may also be able to choose layout options, and select any additional bookable resources.
Layout
If the room has layout options, you will be able to select your required layout from the dropdown. Once you’ve made a selection, you will see a diagram and the details of that layout.
Bookable Resources
If there are any additional resources available to book, they can be picked in the checklist. You may need to enter the quantity required as well.
Read the terms and conditions and accept them by checking the box.
Check the details of your booking, and click Reserve.
Unmediated bookings will be confirmed at this point, and no further action will be required.
Mediated bookings will have been submitted as a request, and will now need review and approval by an authorized user before they are confirmed.